Assets Tab

Asset Log

The “Assets” tab is how the user will access the “Asset Log” module of the application. The “Assets Log” is designed similarly to the “Evidence Log.” This feature is available for anyone with “Asset” permissions and has 4 new tabs to choose from (Setup, Reports, Archive, and Help).

The “Assets Log” (see figure 96)is the primary input screen for assets and the heart of the asset management portion of the PMI Evidence Tracker™ application. All property is logged neatly and systematically into the program, ensuring that each piece of equipment is managed in a consistent and accurate manner. Information on an asset, its location, and to whom it is assigned can be quickly produced on demand.

Figure 96

Notice the “Asset Log” uses a simple, one-screen format for entering data as well as seven options listed in the left pane, i.e., “Print Label,” “Find,” “Delete,” “Add,” “Cancel,” “Save,” and “Attachments” as in the “Evidence Log.”

Customizing the asset log

To customize the “Asset Log” the user must have “Administrator” permission. The customization process of the “Asset Log” is identical to the “Evidence Log.” Please refer to the process for customizing the “Evidence Log” as a guide to customizing the Asset Log.

Entering Assets

When the user first access the “Asset Log,” they will notice that some fields are shaded yellow. All yellow shaded fields are mandatory and must be filled in before a record can be saved. The user can move from field to field in this screen either by pressing the “Tab” key or by selecting the desired field.

Setup

The “Setup” tab is where the user can reset the field headers by selecting “Reset Field Headers.”

Asset reports

The “Reports” tab (see figure 97) will list all preloaded “Asset” reports. (Asset List, Archived Asset List, Asset Category Report, Asset Receipt, Audit Report, and Express Custom Reports (which will open the same Express Custom Reports as the reports tab on the main screen)).

Figure 97
asset list

The “Asset List” report (see figure 98) generates a report that displays all assets entered in the “Asset Log.” The report will also show items that have been “Liquidated.”

Figure 98
Archived asset list

The “Archived Asset List” report (see figure 99) will display all assets that have been archived. The report will also show all information regarding that asset, it will also show the date it was liquidated.

Figure 99
asset category report

The “Asset Category Report” will populate a new window (see figure 100). This window will display a list of the department’s asset category. The user will then select a category from the list that they wish to recall information about.

Figure 100

After they select a category and select “Report” a report will populate showing all items under the category that are active (see figure 101).

Figure 101
asset receipt

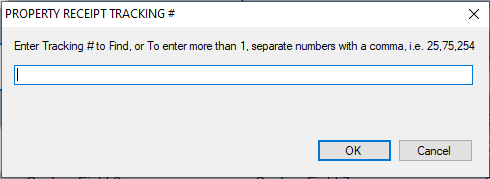
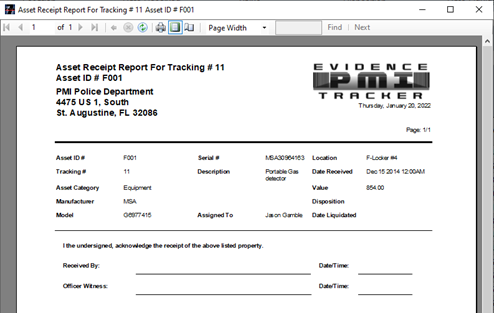
The “Asset Receipt” report (see figure 103) will produce a receipt much like the property receipt in the evidence portion of the application. When the user wants to print a receipt for an asset, they will select this option which will populate a window (see figure 102) where the user can input the tracking number of the item they wish to print a receipt for.

102
Figure 103
Asset Audit Report

The “Audit Report” (see figure 105) in the “Asset” module area of the application if selected will populate a window (see figure 104) for the user to input their desired audit parameters. The report is for a user to print and conduct a hand audit of the assets.

104
105
archive

To archive an asset, the user must first edit the record and add “Date Liquidated.” If there is no date for the “Date Liquidated” the item will not show in the archive list (see figure 106) to be archived.

Figure 106

The system will not show an item in the list of assets to be archived if the “Date Liquidated” has not been entered. To move an item from active to an archive, double click an asset to archive and then select “Archive One.” If the user wants to archive all the items listed in the “Archive Case” list, select “Archive All.” Once completed, the item will be PERMANENTLY removed from Assets. The user can view the archive database at any time by running “Archived Asset List Report.”

Asset Log

The Asset Log, built in to the PMI Evidence Tracker, functions the same way that the Evidence Log does and you enter an asset the same way you enter a piece of evidence.

Adding Assets

Click Add.  Fill out the form with all the relevant information.  White fields are optional.  Yellow fields are required by the program.  Date fields can be in standard MM/DD/YY notation or MM/DD/YY hh:mm notation.  Click Save when you are finished.

Making Fields Required (NEW in version 7.3)
Any filed in the Asset Log can now be made a Required Field (Note: This is only available to program Administrators). Simply right click on the field name and click ‘Required’ in the context menu. The field its self will turn yellow and is now required in order to create a record in the Evidence Log.

Assigned To
The biggest difference between the Asset Log and the Evidence Log is the ‘Assigned To’ field. This field, when used properly, can tell the  Quartermaster who had that particular piece of equipment before it gets reassigned to someone else. In this way, it helps the Quartermaster keep track of those using the items and the condition that they are brought back in.

Working with attachments

Once an item is saved to the Asset Log you may want to add attachments to it.  Simply select the item and click the Attachments button.

Click Browse to add files.  Alternatively, or Drag and Drop files into the list to add them.

To delete attachments simply right-click on one and select delete.

A picture attachment can be set to automatically preview when you select an item on the Evidence Log.  To determine which attachment is previewed click on the Default check box for that item.

Printing Labels

Printing labels is pretty straightforward.  Select the item you want to print a label for and click the Print Label button.

The system loads the label template that is specified in System Setup.  Based on the layout of the template file the system prints a barcode label to the printer specified in System Setup.  If your barcode label printer name does not match the name specified in System Setup then Windows hangs onto the print job and nothing prints out.  Make sure your label printer is named PMIPRINTER, not ZDesigner GC420T.

Finding An Item

  1. Click Find.
  2. Select which field you want to filter the Asset Log by.
  3. Type in what you want to search for.  Add percentage signs (%) for wildcards at the beginning and the end as necessary.
  4. Click OK.

Deleting an Item

To delete an item simply double-click it and click the Delete button.

Working with the data grid

The asset items that your department has are displayed on the bottom of the Asset Log in a grid.

Showing more rows

For better performance the Asset Log loads the most recent 30 transactions by default.  To see more click on the 500 or ALL tabs at the bottom of the grid.

Sorting by column

By default the Asset Log grid is sorted by Tracking Number, descending to show you the most recent items at the top.  If you want to sort it a different way simply click on the column header of the column you want to sort by.  Keep in mind that you may need to load more than 30 rows to use sort the way you intend.

Customizing the Evidence Log

It’s very easy to customize the Evidence Log to your needs and preferences.  An Admin user can Rename a field, Hide a field, Move a field, and Edit the list of items for a Drop Down Field.

Rename a field

To rename a field right-click on the name and select “Edit Name”.  Type the new field name. Click outside of the text box to finish editing.

Hide a field

To hide a field right-click on the name and select Hide.

Add a field

To show previously hidden fields click on the Green Plus symbol just above the top of the grid.  Then select which field you want to bring back.

Move a field

To move a field right-click on the name and select Move.  A box is placed around the field that is going to be moved.

Now click on where you want the field to go and it will move there.

Saving your layout changes

Editing, Hiding, and Moving fields are changes to the layout of the window.  For this new layout to be saved you need to close the window and say Yes to whether you want to saved the changes.  Then re-open the window.

Until you close the window and save the changes all other users will continue to see the old layout.

Edit the list of items for a Drop Down Field

Right click on the field name, then click ‘Edit Items’  Another context window will pop up. Click the Add button and then type what needs to be added to the dropdown. Click Save. You new item has been added to the list. You can now close the context menu.

Unlike Editing, Hiding, and Moving fields, when you edit the items in a list it is saved immediately.