
batch in
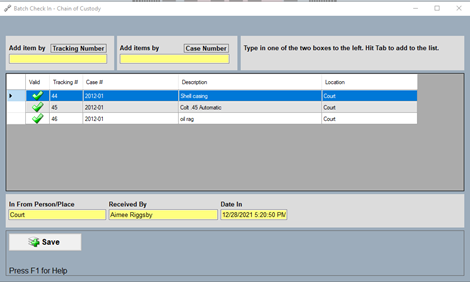
The “Batch In” (see figure 60) option is used to batch MULTIPLE items into the evidence/property room. Remember all items the user wants to batch into the application, need to be going to the same “Evidence Room Location.” The user will need to either scan the tracking number on the evidence label or input the tracking number via the keyboard into the yellow shaded box labeled “Tracking Number.”
If the items can be batched into the application, there will be a green “checkmark” shown in the “Valid” column as shown in figure 62. If the user receives a red “X” in the “Valid” column, the user will need to search the chain of custody log and verify the item was batched out.
The user will then need to input information for “In From Person/Place,” and “Received By.” Then the user will need to select “Save.” (see figure 62)
batch out
The “Batch Out” (see figure 64) option is used to batch items or evidence out of the evidence/property room, for example, if an item is returned to the owner, the user would use this option. The “Out To Place” would be the disposition of that item, i.e., “OWNER.” The “Received By” would be the person accepting the item from the evidence/property room. The “Date Out” is automatically stamped by the PMI application. The “Reason Out” would be information the department needs to process the item out, i.e., “Court Order.”

The “Case Number” option should only be used if the user is batching ALL pieces assigned to the case number in or out and to the same destination.
final out
The “Final Out” checkbox is used for items that will not be returned to the evidence/property room. For example, if a case is closed and some of the items were not used as exhibits in the case, the case is closed and there is a recorded conviction. The custodian will use the “Final Out” checkbox to remove the item from the evidence log and end the chain of custody.