
After Installation is Complete
Initial Start-up
To use the PMI Evidence Tracker™ application double click on the icon. A login screen will appear (see figure 1). When the login screen appears, input “admin” for both the “User ID” and “Password.” Be sure that you use lower case for both fields, as they are case sensitive. Once you have entered the User ID and Password, select “Log In.”

Define department
Once the user selects “Log In” the user will be prompted with a message telling them they need to define their department to continue in the application. Defining the department (see figure 2) is the first task the user will need to perform before any other actions can be taken.
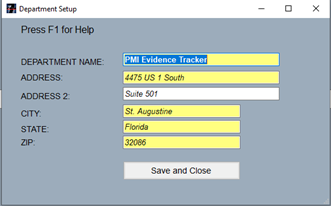
Fields highlighted in yellow throughout the application indicate that they require data to save and continue. Once the required fields have your department’s accurate information entered, the user will then select “Save and Close” and continue to the main screen.
Main Screen
The “Main Screen” (see figure 3), or “Home Screen” is the first screen the user will see after logging in. The main screen has nine tabs to navigate which include “File,” “Setup,” “Audit,” “Evidence,” “Chain of Custody,” “Archive,” “Reports,” “Assets,” and “Help.”

System Setup
The PMI Evidence Tracker™ System Setup screen is located under the “Setup” tab on the main screen, (see figure 3) and then, by selecting “System Setup” (see figure 4) located at the bottom of the list. The “System Setup” is where the user can view the path to the evidence, asset, and shelf labels, as well as the path to where the evidence and asset attachment files are located. The user can also run or set a scheduled backup, and perform a database restore.

After completing the required information, select “Save and Close.”